Showing posts with label Christmas. Show all posts

Sunday, December 22, 2019

Recipe of the month: Triple Chocolate Trifle


Christmas celebrations are not complete without a trifle. And any kind of trifle will always look smashing on your Christmas table that has layers of goodness and cream! Trifle recipes are great to have in hand especially when you have to feed a large crowd. You can make it boozy or non- boozy which is purely your choice. As always I chose a hassle free and stress free recipe that’s tastes divine and looks gorgeous. This year I decided to stick to Chocolate trifle…. Because you can never go wrong with chocolate!! I was so happy the way it turned out and how it was wiped out clean. So this recipe has layers of brownie and dark chocolate cake, chocolate pudding, crushed chocolate nibbles for crunch and whipped cream. Try and bake the cake and brownie in advance to save time and trust me the rest will fall in place.


 Look no further if you are searching for a dessert recipe for your Christmas table. Here is the recipe for my favorite Chocolate Trifle


Ingredients


Baked brownies (Click here for my recipe) – cut into small squares


Baked dark Chocolate Cake (Click here for my recipe) – cut into small squares


I box of instant chocolate pudding


1 pkt of Maltesers or Mcvities Chocolate Nibbles


2 cups of whipped cream (already whipped stiff and kept aside)


Method


1.       Prepare your pudding as per the package directions.

2.       Crush the Maltesers or the chocolate nibbles but make sure they don’t turn too mushy.

3.       Layer about 1/3rd of your cake cubes (dark chocolate and brownies) in your favorite trifle dish.

4.       For your next layer add a huge scoop (about 1/3rd) of chocolate pudding over the cake pieces.

5.       Sprinkle the crushed Maltesers or chocolate nibbles on the pudding.

6.       And then spread whipped cream over it (again 1/3rd of it).

7.       Repeat this process of layering two more times, ending with whipped cream. And garnish it with Maltesers and Chocolate Nibbles.

8.       Refrigerate it for at least two hours before serving.


Tips

  • If you want to make it boozy, drizzle Irish cream liqueur on the cake.
  • And if you do not have the time to bake brownies and cake, buy them and use it for the recipe. 
  • This recipe can be made a day before and this saves time!


How easy was that?? I hope you enjoy making it! And if you do make, please email me and keep me posted. I always love to hear feedback. I hope you are enjoying the countdown to Christmas!!


Above pictures are copyright Tickled by Inspirations


Monday, November 25, 2019

A Christmas DIY centre piece


I say it’s about time we start gearing up for Christmas… and it’s never too early…


One of the most important element of Christmas other than food, baking and family, is the décor… the tree needs to go up, along with all the lights… you need to decide on what crockery to use and on the colour theme…  It can get busier as Christmas is approaching so you would rather stick to some simple DIY which you can handle. Christmas table centre pieces are an integral part of décor in your home … for your coffee table and for your dining.


I have a simple centre piece for Christmas that is simple, elegant and that too it just takes ten minutes!


Here is a list of things that you need :
  • a single tier or double tier cake stand 
  • your favorite Christmas sparkly ornaments
  • a few pine cones 
  • a few Christmas tree branches (if you want but I didn’t use any) 

Arrange all the above elements on the cake stand.. you can even use a string of lights and voila! your centrepiece is ready!


Let me know what you think of this DIY décor...and if you have any DIY decor to share, please get in touch with me at tbinspirations@gmail.com .


Above pictures are copyright Tickled by Inspirations


Sunday, December 23, 2018

Recipe for the festive season: Chocolate Crinkle Cookies


Holidays and traditions go hand in hand and baking will always be my favorite tradition in our household. But I think the tradition is not much in baking but rather the memories and love wrapped up in all those baked goodies and I will keep baking every year to share my love.

Chocolate Crinkle Cookies are my family’s current favorite this Christmas…. It’s soft, tender, mildly fudgy and covered with snow dust… and that crinkle on that cookie makes it look so pretty, festive and a crowd pleaser. The dough for this cookie can be easily made but I have to warn you that it’s fairly sticky dough so you have to roll the cookie dough into the powdered sugar and shape it so that it doesn’t stick to your hands. This cookie is a winner and I hope you get to try it out. 
So here is wishing all my readers a Happy and Merry Christmas and a Blessed 2019!! Lots of love and hugs coming your way!!


Please click here for the recipe. This recipe was super easy for me and I hope you enjoy making these!! Enjoy the chocolate goodness!!


Above pictures are copyrighted Tickled by Inspirations 


Thursday, December 21, 2017

DIY Christmas Cards


Gone are the days when we used to make Christmas cards and post them to our loved ones…

In order to revive this and keep the tradition going, my dearest sis’ Anju took the initiative to pull all our cousins together on this little project. So all of us decided to make simple Christmas cards and send to each other. And this small initiative brought back nostalgic Christmas memories. Mailing addresses were exchanged with each other… and our creative skills were put in use. (Thank you Anju!)

I came across a brilliant DIY Christmas project on Pinterest where you just use Q-tips and some acrylic colours. And I had a fabulous time doing this with my 7 year old!!


  • So all you need are some acrylic colors - preferably Christmas colors, Q-tips for each color, Colored or white card paper and a paper plate to put colors on.

  • Create a card by folding the paper.

  • If you are making a Christmas tree then dip your Q-tip on green color and make dots into a tree shape.

  • Then add ornaments by making different colored dots. It is as simple as that!!!

  • Use your creativity, make any Christmas scene and have fun doing it with your little ones!!!


All above images are copyright Tickled by Inspirations


Monday, December 18, 2017

Chocolate Roast Almond Bark


Christmas is calling and you definitely need chocolate during this season! Any recipe for a chocolate bark is one the easiest non-baking treats to make and a great homemade gift. Absolutely simple to make and it is a recipe where you can keep improvising with the ingredients. This is a highly addictive and easy to make treat and I am sure you will enjoy making it. So let’s move on to the recipe.


Makes about 30 pieces

Ingredients

10 oz. semi-sweet Chocolate chips

1 cup sliced almonds

1 tbsp. Butter

½ cup or more crushed toffee bits (you get it readymade)

A pinch of salt


Method                                                                           

1.       Line a baking sheet with parchment paper.

2.       Toast almonds in butter with salt.


3.       Melt the chocolate in a microwave-safe bowl and cook on high in the microwave in 30 second bursts, stirring after each one, until melted and smooth.


4.       Once the chocolate is melted and silky in texture, add the almonds, crushed toffee bits and stir well.


5.       Pour the chocolate onto the parchment paper and use a rubber spatula to spread it in a thin layer. It will cover the better part of the baking sheet. Sprinkle the balance toffee bits and sprinkle stars on it as I did to add color.


6.       Put the baking sheet into the fridge for 10 minutes. Remove from fridge and leave on the counter to cool and harden for several hours or overnight.


7.       Once completely cool, break the chocolate into pieces that are a couple of bites each.


8.       Store in an air-tight container or package up for gifts.


Tips:
·         Add raisins or any dry fruits to give a different flavor
·         You can substitute almonds with walnuts and pistachios.
·         You can use dark chocolate or milk chocolate or even white chocolate.


Above pictures are copyright Tickled by Inspirations


Monday, December 11, 2017

DIY Christmas Center Piece


It is that time of the year… The weather is chilly and perfect… cups of coffee and hot chocolate being served around… the Christmas tree and décor is up… the baking aroma from the kitchen constantly giving us nostalgic memories… and the carols playing in the background. Perfect countdown to Christmas...            

Every year for Christmas, I try to come up with something new for my coffee table and this year I am trying out with something old, new and gold… All you need is a small or mini cake stand, any Christmas ornament to flaunt on your cake stand and some pine cones to sprinkle around and voila your center piece is ready to make a statement. I placed a mini Christmas tree on my cake stand instead of ornaments. Use your imagination to place something nice on the cake stand like scented candles or pine cones.  It is simple, less time consuming and looks fabulous! Tell me what do you think of my coffee table center piece?


All the above images are copyrighted Tickled by Inspirations


Thursday, December 7, 2017

Recycled DIY Cards


One of the nicest things about recycled cards is that it’s a great way to teach about recycling and sustainability. I had a pile of some wedding invitation cards that’s of absolutely no use now and I stashed it away hoping to recycle it all at some point. And since Christmas is around the corner I decided to recycle these invite cards into Christmas cards. So I cut them all into half… discarded the inner sheet that had the invite details and used my recently acquired calligraphy skills in use. Isn’t it a gorgeous (and green)idea?

Love these self embossed prints on the card... so hard to throw them away! 
Cut the card into half... I will definitely use the Invitation printed side for future use so I have kept it away :)

My Calligraphy skill in use!


Lots more to write!!


Do you have a fun project for Christmas? Please share your ideas with good resolution pictures and mail to tbinspirations@gmail.com . I will gladly share it with my readers.


Above pictures are copyrighted Tickled by inspirations


Saturday, December 2, 2017

Hello December


I had to pinch myself to believe we have finally set into the month of joy and giving… And I am yet to put up our Christmas décor and the tree… So instead of thinking where the time flew I think it’s better to just dive in to the festivities!  


I am so sure many of you have already put up your gorgeous Christmas tree and busy with your DIY and into Christmas baking. Do share your décor ideas or DIY or recipes and email me at tbinspirations@gmail.com  . I will gladly share it on Tickled by Inspirations wall.

Meanwhile stay tuned to some of my Christmas DIY inspirations. Enjoy this beautiful season! Let this December be kind to everyone, hopeful and reassure us all a bright new beginning!


Above Images Copyright Tickled by Inspirations.


Tuesday, January 3, 2017

New Year thoughts and Christmas warmth from my home

2017 has begun… and as always I am hoping for a happy and healthy new year… Life is all about ups and downs … my trials my pains has made me what I am today and none of these shattered my inner personality…. And more importantly I am still grateful for my family and good friends around me that is my support system. I still want to continue to make everything around me more beautiful …. continue to be comfortable in my own skin … do the different… be me… laugh loud… dance away, continue to count my blessings, be more fit, eat right, stay healthy and learn something new whenever there is an opportunity. So cheers to 2017 and I hope to continue a beautiful journey with all my readers out there!!! Shine on…. Glitter away and sparkle in whatever you do….

Here is a glimpse of the Christmas warmth from my home before I bring down the décor….


brownies recipe coming up... stay tuned!
 
mulled wine


Cheers to more inspirations and blogging


All images are clicked by me


Wednesday, December 21, 2016

DIY Christmas Decor

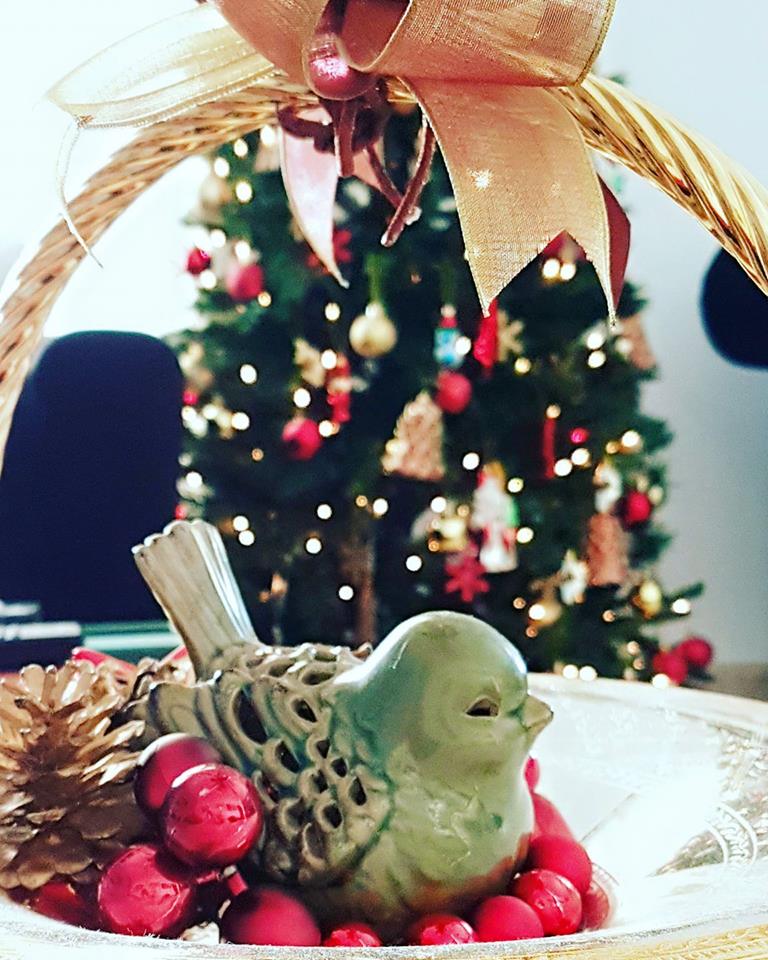
Every year for Christmas I have managed to come up with a different center piece for my coffee table that is not too bulky and easy to handle. This year I managed to pull off a super simple DIY… all you need is a fruit stand, some pinecones or ball ornaments, a bow and a favorite birdie and here is what it looks like...


I am sure you will come up with an even better DIY… Enjoy the season!!!


Images are clicked by me


Sunday, December 20, 2015

DIY Christmas Decor

I always enjoy creating my own Christmas centre piece which I do every year. This is so simple to create, yet elegant and budget friendly. Display the pinecone ornaments and shiny ball ornaments in a bowl. To give a more rustic look you can even layer it with wreath.

Have a look at these pictures of my centerpiece and I hope this inspires you and enjoy the countdown to Christmas!


Images are clicked by me